Skills
A Skill is one ability of the bot, something that the bot can do and can do well. It can be seen as a defined conversation flow that accomplishes one task. The complexity of a Skill can vary. For example, a bot could ask for a name, book an appointment or open an account, etc..,
A Skill can be split into different parts:
- Triggers and keywords and buttons (which can be used elsewhere as well)
- Skill blocks
- Follow-up.

Triggers
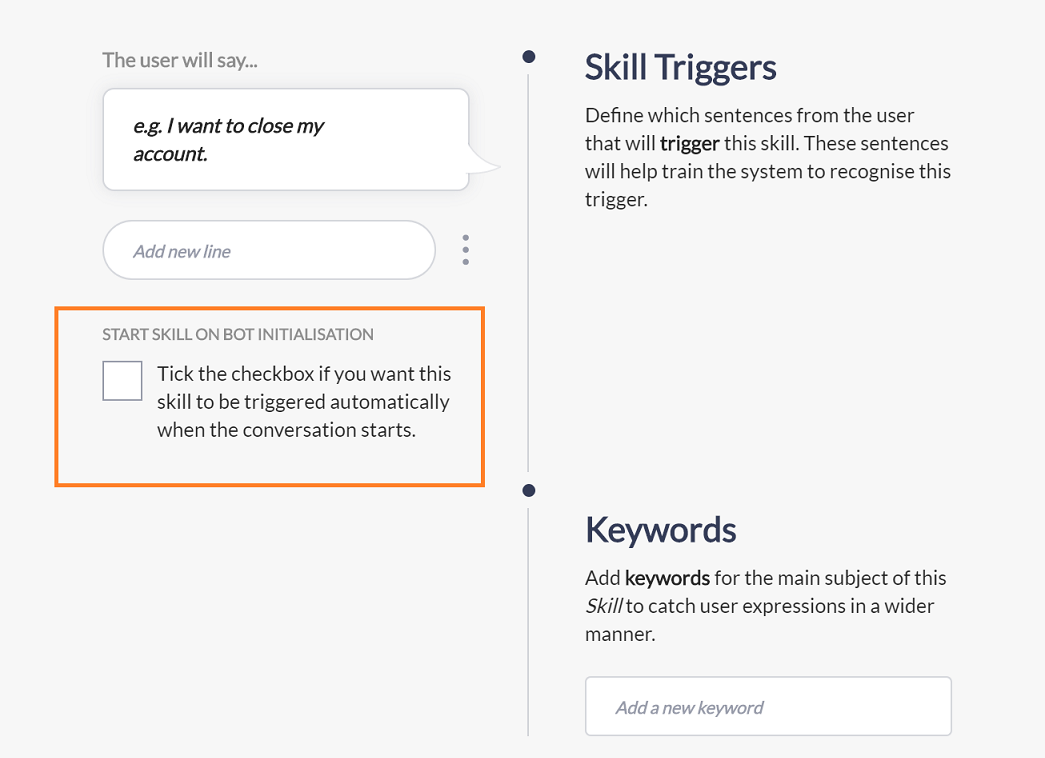
Triggers are examples of how the user would express their intentionality to start the Skill. In other words, they are sentences that the end user might say to the bot and that will trigger the Skill. These sentences will help to train the system to recognise when it is appropriate to start the Skill in response to a user input.
The sentence “I want to open an account”, for instance, could be a trigger for the Skill “Open account”, which will be started when the user says that sentence or a similar one. Thanks to the machine learning model learnt by the chatbot, triggers are used so that even when the user does not say the exact same sentence as in the trigger, the bot still understands.
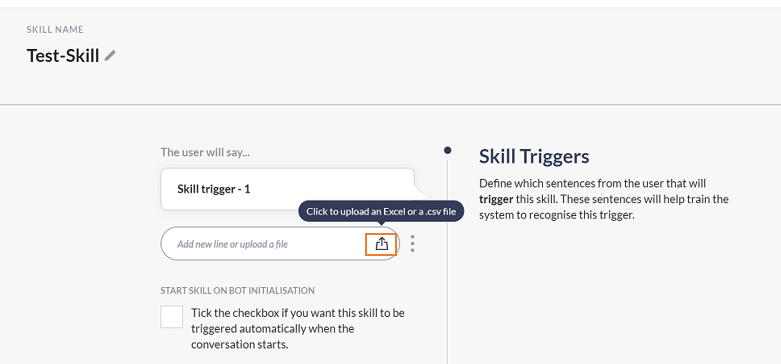
Skill triggers can be added directly in the UI or can be uploaded via CSV or excel file. Click on the upload icon and select the file to add multiple triggers at once. Make sure that there are no headers in the file. The CSV file is comma separated by default and you can specify the separator explicitly by adding it at the end of the triggers in the file. The non-empty cells in the Excel file will be added as a skill trigger. Duplicate triggers in the file will be removed when it’s uploaded.
Keywords
Helps the chatbot to suggest a relevant disambiguation question when it is not sure about the user input. Keywords can be shared between Skills and the chatbot will present, in the disambiguation question, all the associated Skills as options. The keyword “account” could be, for instance, shared by two Skills: “Open an account” and “Close an account”. If the user uses the word “account”, and the bot is not confident enough on whether it is an open account trigger or a close account trigger, the bot will ask the user to choose between these two Skills. Note that the keywords are case sensitive and the relevant disambiguation questions will be triggered only when the exact match is found.
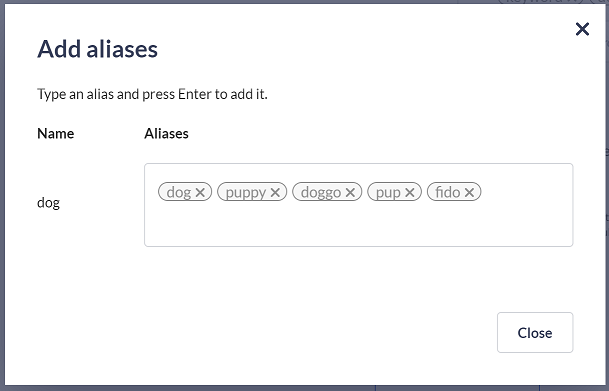
It is also possible to group your keywords. Click on the keyword to which you want to add aliases. A popup will appear on the screen that allows you to add aliases to that keyword. Similarly, you can remove the aliases from the keyword if it isn't needed anymore. Note that the keywords which are added as aliases can’t be added as keywords or aliases to other skills/FAQs.
Types of buttons
Buttons are available to add as responses for the chatbot for the user to click to choose or activate certain features. You can add buttons in many places of the chatbot, including in the Skill section, Conversation Snippets, and so on.
Skill Button
To trigger the particular Skill based on the user selection. For example, the bot can help the user to open and close the account. In the conversation snippet two buttons are created with the Skills respectively. During the conversation if ‘Open account’ button was clicked then the 'Open Account Skill' will be triggered.
Variable Button
Allows the user to click the variable button to edit previously collected variables. See the variables section for more.
Text Button
To display the list of texts and also it can be used to trigger the other Skills and FAQs when the button’s value field has a Skill trigger or a text similar to the existing FAQ question.
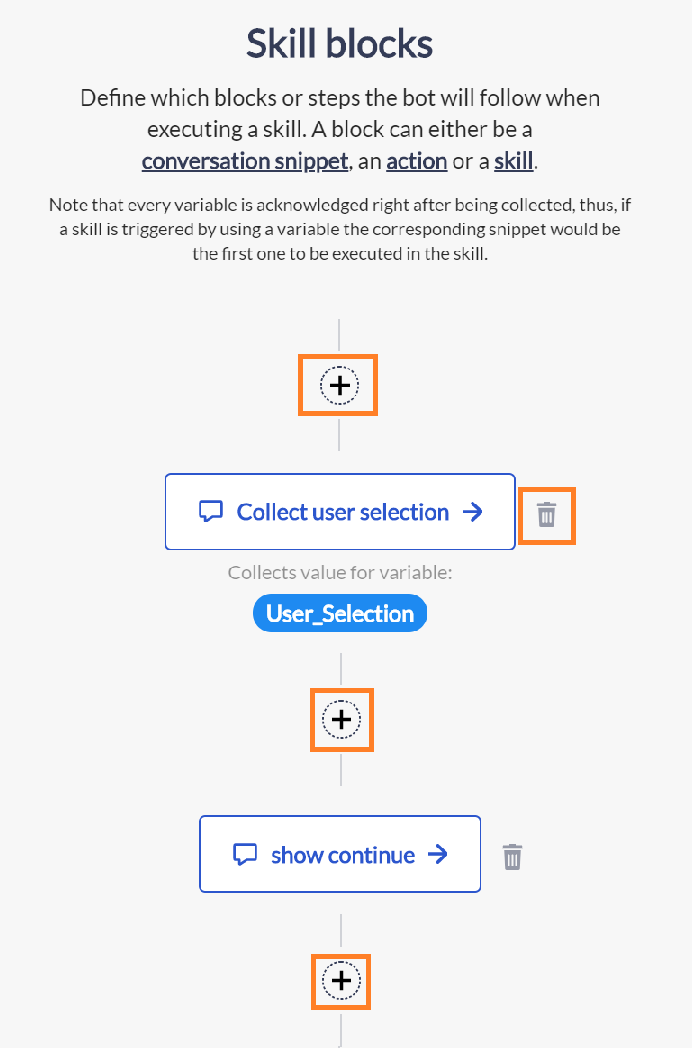
Skill blocks
These are the building blocks for the conversation flow. The system is thought to be very modular so the chatbot admin can use components from the toolbox to define the flow of a Skill. These blocks can be re-used in the same Skill or in other Skills. A Skill can also be a building block of another Skill. Skill blocks can be an action, conversation snippet (both simple and the one which collects the variable value) and the other Skills.
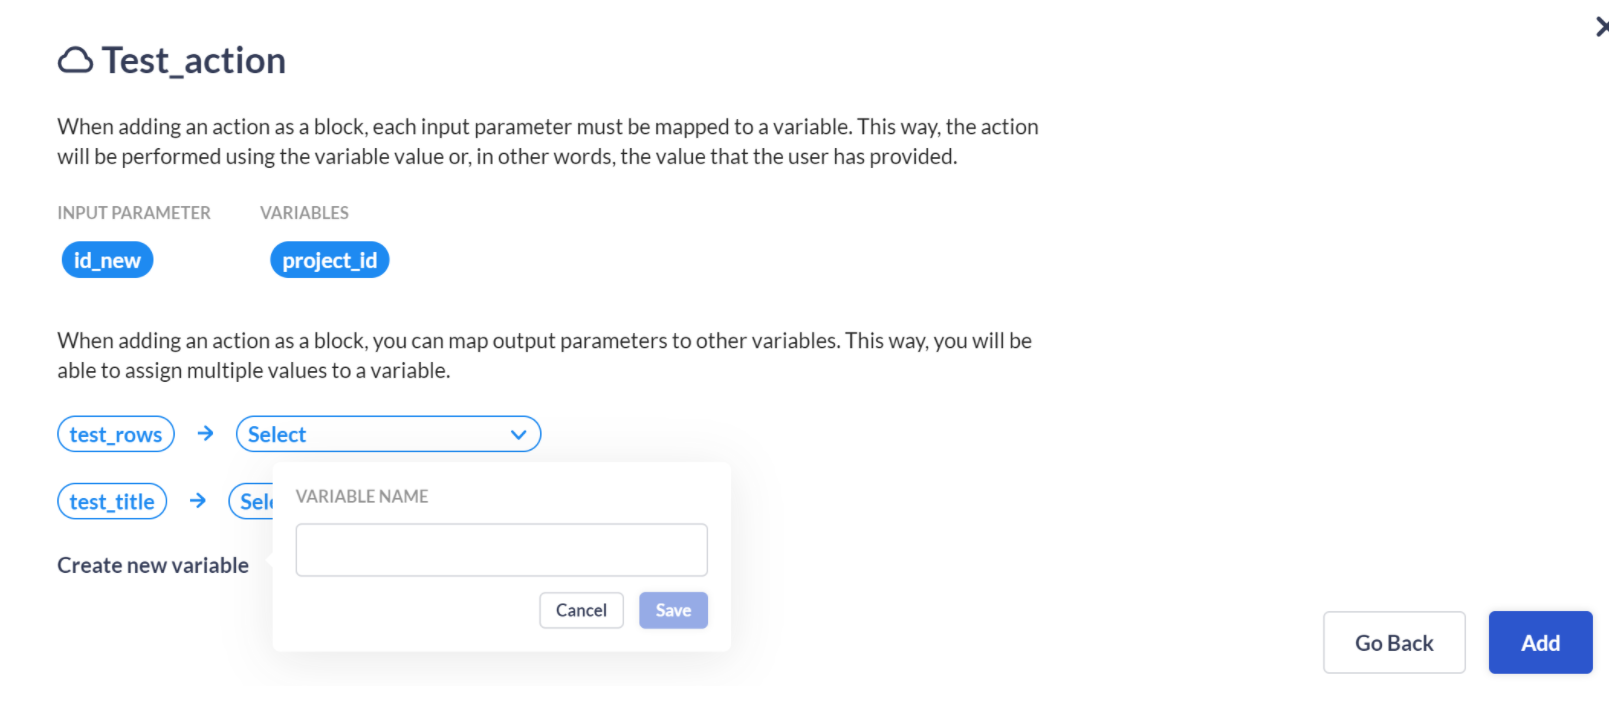
Action
Input parameters should be mapped with the variables which are collected in the Skill at that point. Output parameters can also be mapped to the variables optionally. You can create a variable to which you want to assign the output parameter while adding an action to the skill block. These variables can be found in the variables tab as computed variables with an option to edit and delete.
Redundancy in the conditions can be reduced by using this feature as multiple actions are updating the same variable. For example, Imagine that we have a weather bot. It first asks the user if they want weather for the US or for Europe. Depending on that it will use either the US Weather API or the EU Weather API actions. After fetching the weather it is returned by the user and some conditional logic happens depending on the temperature. If the temperature_eu and temperature_us output parameters are mapped to the variable ‘temperature’ then all the conditional logic after that can be shared instead of duplicated.
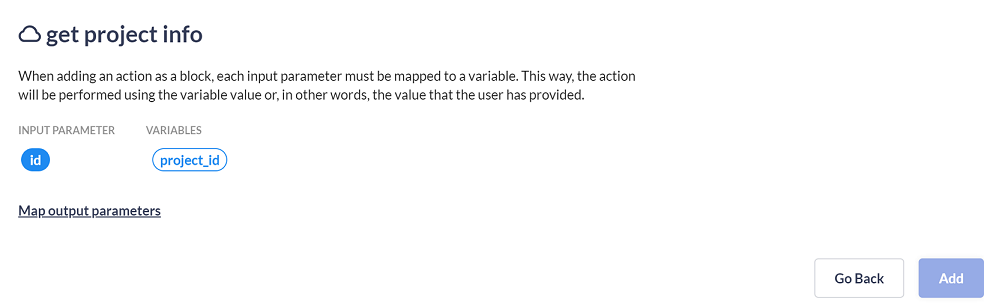
Click on the ‘Map output parameters’ in order to see the options to create and map the variables to output parameters.
Simple conversation snippet
It can be added anywhere in the Skill flow just by using the “+” button.
Conversation snippet to collect variable
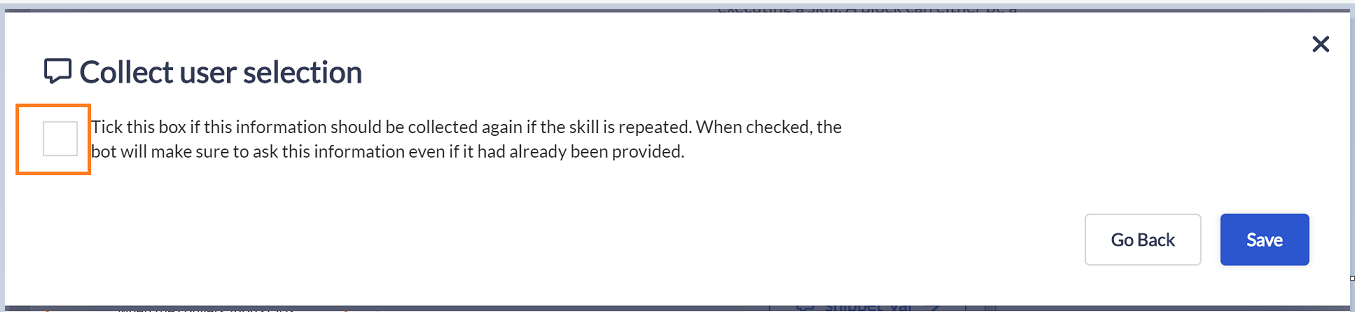
It can be added anywhere in the Skill flow. Also allows the user to choose the option to preserve the value which was collected during the first time or seek for the variable value whenever the block is repeated during the conversation.
This can be achieved just by selecting the checkbox in the confirmation pop-up when adding a snippet as a Skill block.
Skill block
A Skill can also be a building block of another Skill. The variables collected in this Skill can be used in the main Skill for mapping a variable to action’s input parameter and to create blocks with conditions.
Add the Skill block
Click on the “+” icon to add the new block. Also the new block can be added before or after the existing Skill blocks if any.
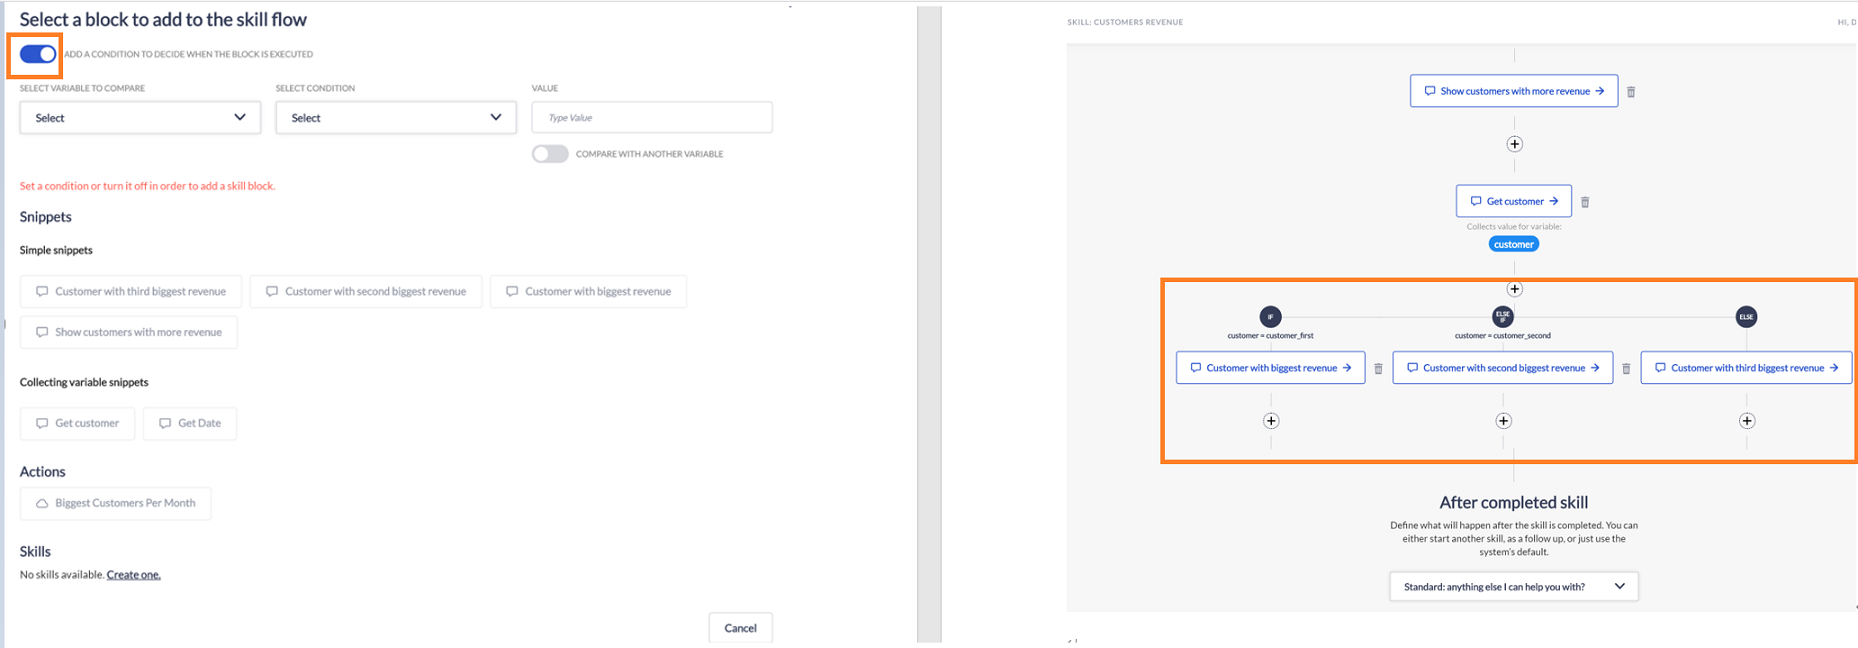
Add the Skill block with a condition
Adding the Skillblocks with condition option is enabled only when there is a block which is collecting the variable value in that Skill. Click on the “+” icon to add a block. Follow the below instruction to add a block with the conditions.
To add a condition block:
Step 1 - Set the ‘Add a condition to decide when the block is executed’toggle button ‘ON’ in the add Skill block window.
Step 2 - Select the variable to compare
Step 3 -Select the condition
Step 4 - Set the expected value for the condition
Step 5 - Select the block (It can be action, snippet or another Skill) and click on ‘Save’.
To add a conditional block with an else statement:
Step 1 - To add an else block click on the “+” icon before the block with ‘IF’ condition.
Step 2 - Select the block (It can be action, snippet or another Skill)) and click on ‘Save’. This block will be considered as an else block for the condition block added earlier.
To add a multiple condition at same level :
Step 1 - To add a block with the multiple condition click on the “+” icon before the block with ‘IF’ condition.
Step 2 - Set the ‘Add a condition to decide when the block is executed’toggle button ‘ON’ in the add Skill block window.
Step 3 - Select the variable to compare. You are allowed to select the variable which is used for the conditional block at that level.
Step 4 -Select the condition
Step 5 - Set the expected value for the condition
Step 6 - Select the block (It can be action, snippet or another Skill) and click on ‘Save’.
Edit the Skill blocks
Skill blocks can be edited at any time after including them in the Skill flow. Click on the pencil icon near the block which you want to edit. As mentioned earlier Skill blocks can be an Action, Conversation snippet (both simple and the one which collects the variable value) and the other Skills. Here are the limitations of editing the blocks based on the type.

1.Conversation snippets to collect a variable value
Users are allowed to change the selection of ‘Ask anyways’ condition checkbox by using the edit option.
2.Conditional blocks
Users are allowed to change the condition parameters at any time. Conditions can be deleted by using the ‘Delete’ link in the edit window if there is no ‘else’ block at that level and then this block will be considered as an ‘else’ block of that level. Also condition can be added to the else block to convert it to the ‘ELSE IF’ block by using the edit option.
3.Actions
Variable mapping to action’s input parameters can be changed at any time by using the edit option.
4.Skills and simple conversation snippets
Edit option is not applicable for these types as conditional input and variable mappings are not required.
Delete the Skill block
Click on the trash icon near the block to delete it. The confirmation pop up will be displayed with the message ‘Are you sure? Do you want to delete the \<block_typ>\<block_name>. Click on ‘Delete’ to delete the block.
Follow-up
The follow-up is what will happen once the Skill ends. By default, the chatbot will handle the Skill end by either continuing with the other tasks that the user has asked to handle or with the “anything else I can help you with” small talk. Instead, if a follow-up is set, when the Skill ends the follow-up Skill will be automatically triggered and started.
Start Skill on bot initialization
To trigger the Skill automatically right after the bot initialization. For example, you wanted to collect information about users before allowing them to use the service. In this case it’s efficient to trigger the Skill which collects the user information right after the bot initialization.
It can be achieved easily by selecting the checkbox in the Skill which you want to trigger after the initialization.
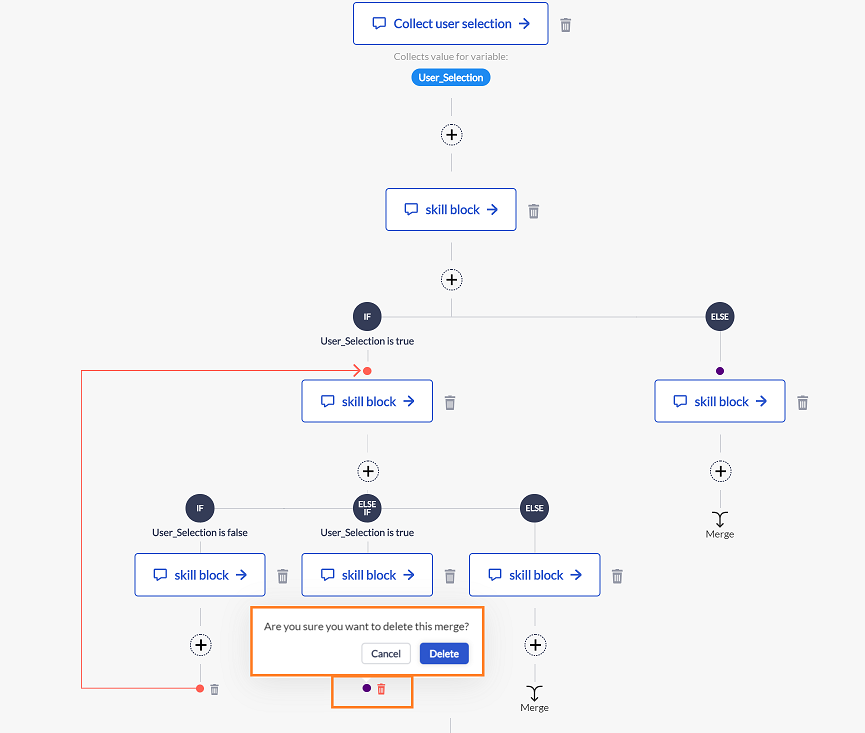
Re-joining of conditional branches
Merge options will be available at the dead ends of all the conditional branches. This feature enables the option to join the end of one conditional branch to the block at different levels or to the other conditional branch to create an execution flow easily.
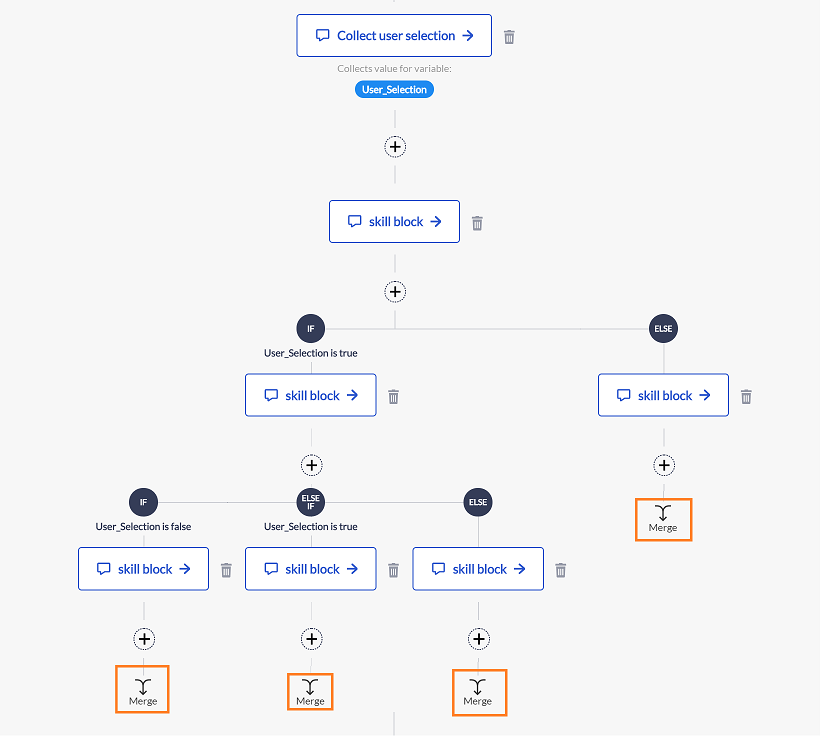
Click on the Merge icon to join the branch with the other block. Now all the other Skill block action icons will be set to inactive and the merge icon will be visible near all possible blocks. Click on the merge icon near the block which you want to merge the flow. Accept the pop-up confirmation to join the blocks. If the block is added before the merge then the merge info will be retained at the end of the newly added block.

Merged flow can be deleted at any time by using the trash icon near the mergel. Click on the trash icon and accept the pop-up confirmation to delete the merge.